
Skip to product information

ATV Race Kit - MX2B
SKU:
sku-49794605613357
$650.00 USD
Pickup currently not available
RWI Performance Wheels
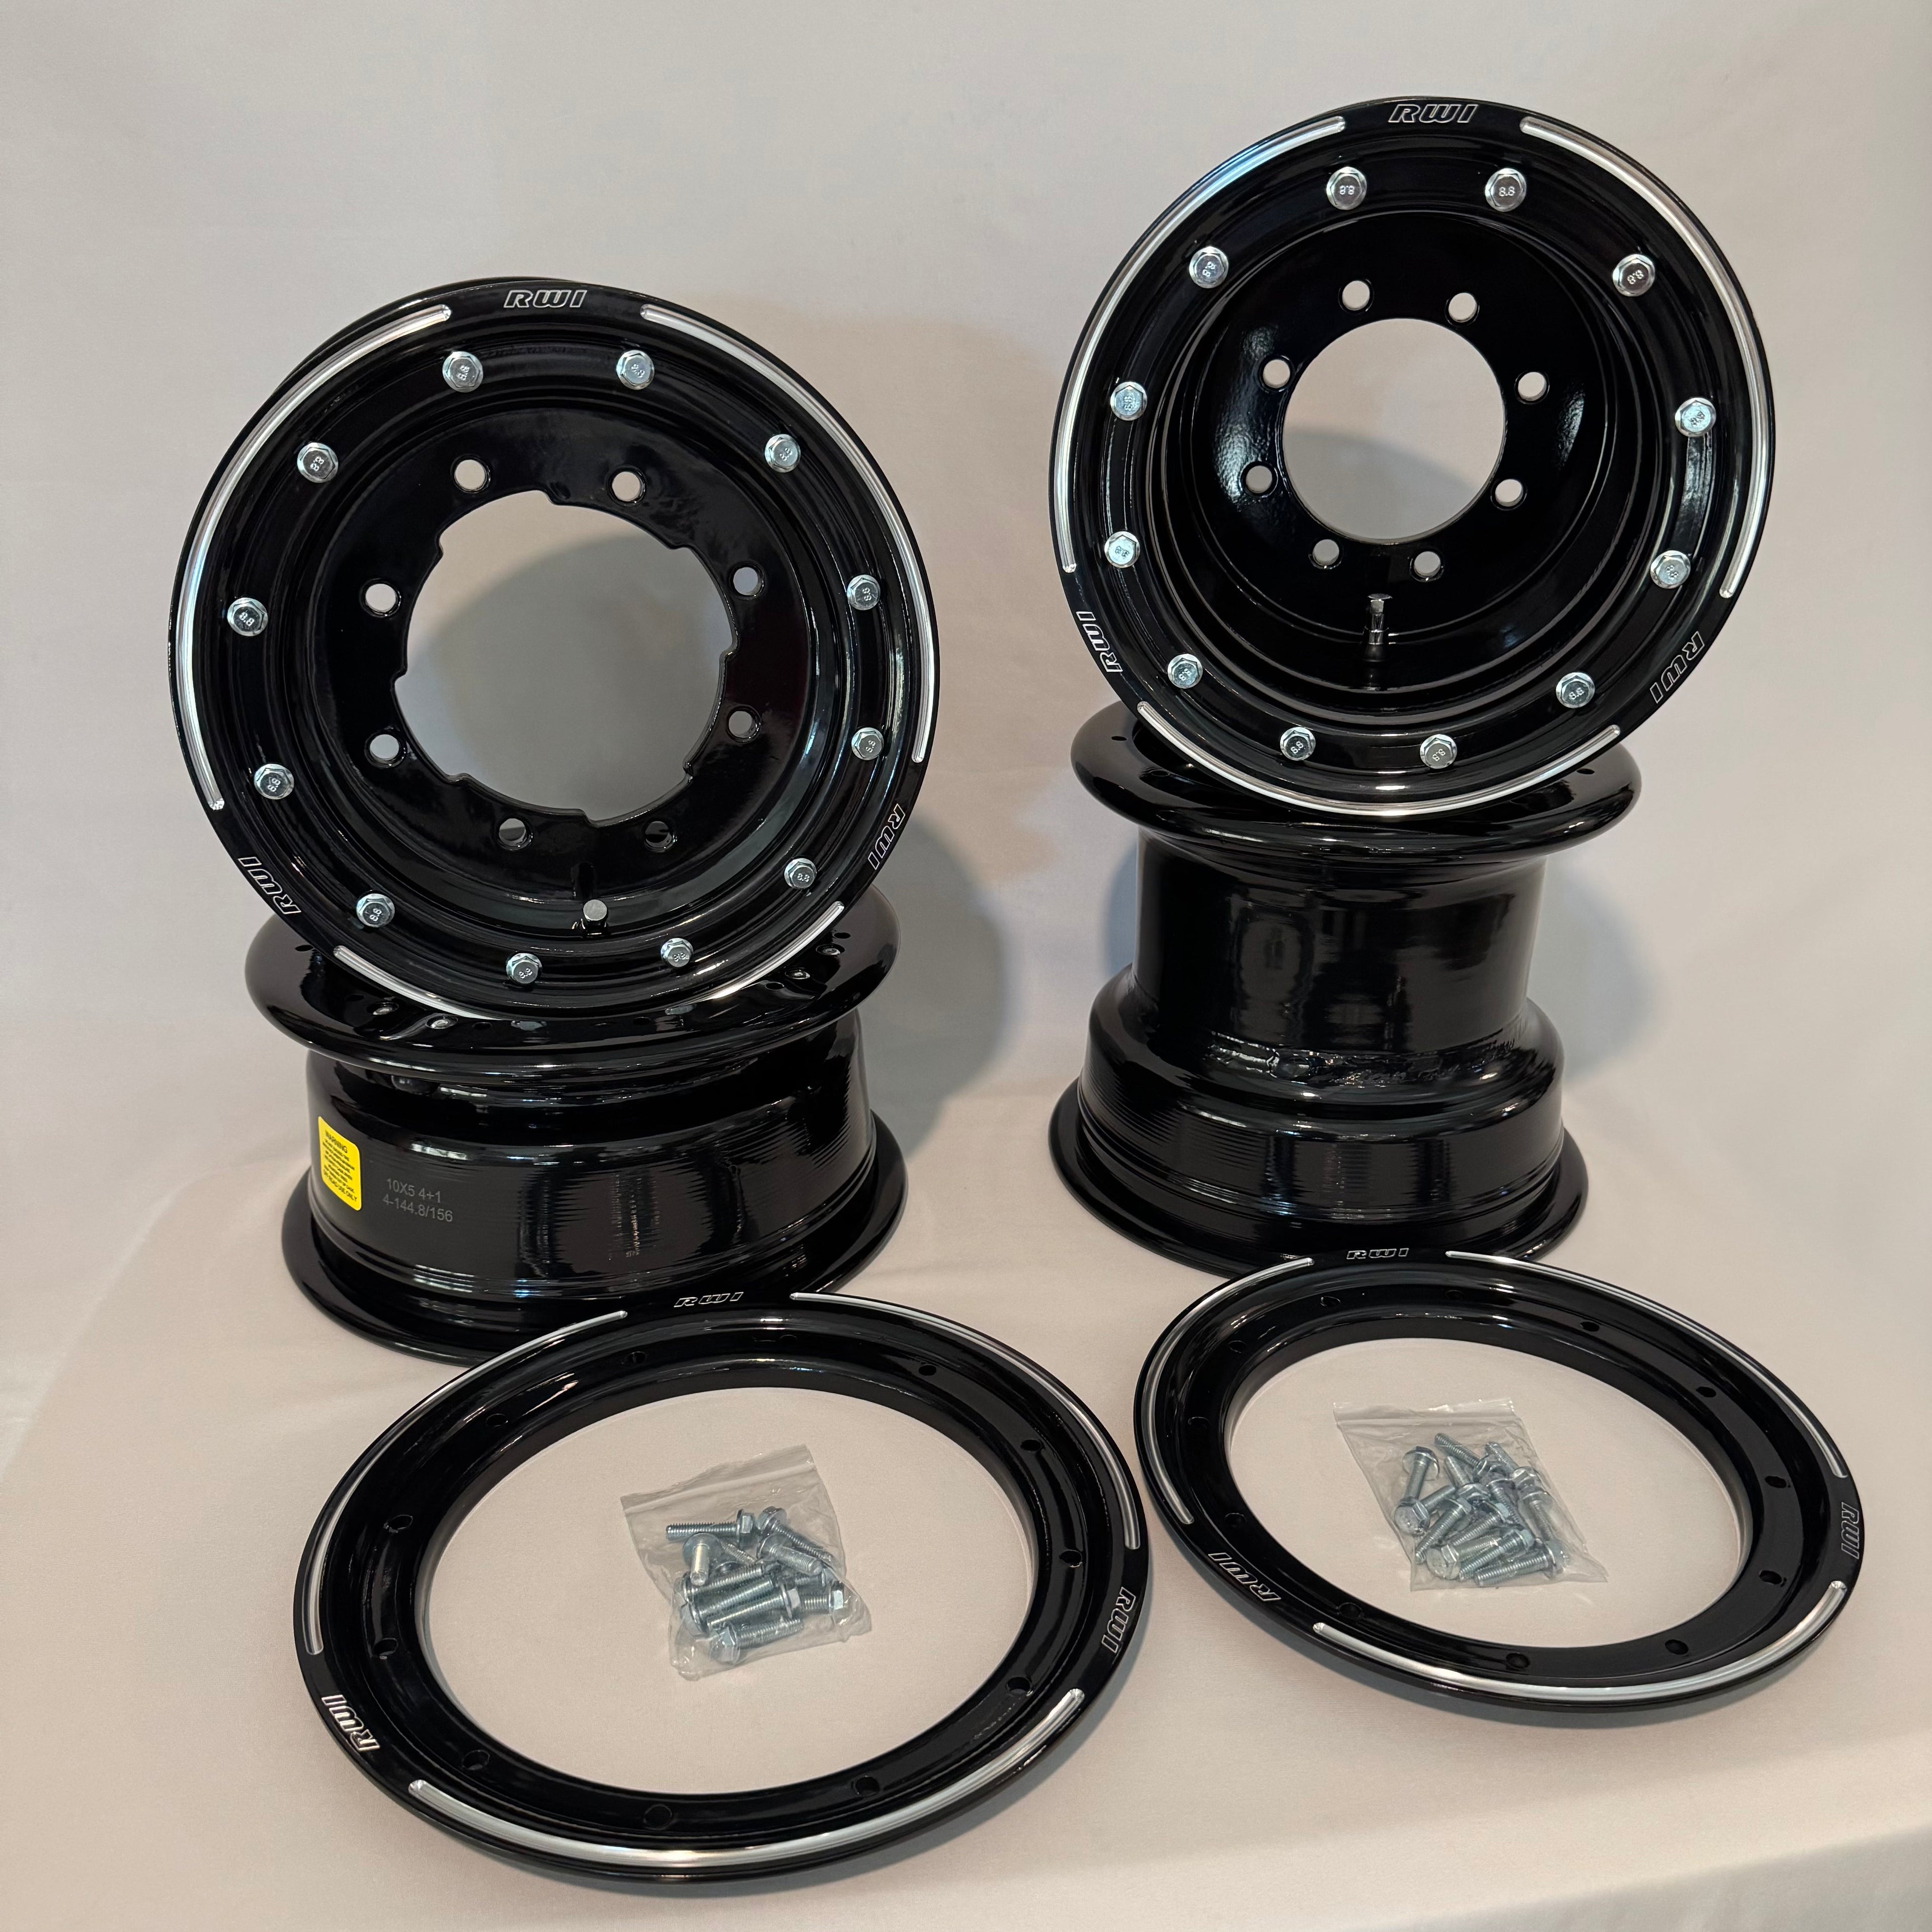
ATV Race Kit MX2B — Front & Rear Beadlock, 6061 T6 Billet Aluminum
The MX2B is a complete front and rear beadlock wheel kit engineered for motocross-style ATV racing and aggressive trail riding. Both wheels feature a reinforced rolled lip on the inside and a single beadlock on the outside, giving you consistent bead security across all four corners without the added weight of a dual setup. Built from heat-treated 6061 T6 aircraft-grade aluminum with a reduced air volume design, the MX2B keeps your tire PSI stable and your handling dialed — lap after lap.
What's Included
Front Wheel
Rolled Lip + Single Beadlock
Reinforced rolled lip on the inside and a single beadlock on the outside for strong, reliable bead retention and precise front-end feel.
Bolt Pattern: 4/144 & 4/156
Rear Wheel
Rolled Lip + Single Beadlock
Reinforced rolled lip on the inside and a single beadlock on the outside engineered to hold the tire bead firmly under hard acceleration and MX-style demands.
Bolt Pattern: 4/110 & 4/115
Key Features
Reinforced rolled lip + single beadlock
Both front and rear feature a reinforced rolled lip on the inside and a single beadlock on the outside — locking the tire bead firmly in place on every wheel.
Reduced air volume design
Minimizes PSI fluctuation during heat buildup for more consistent tire pressure and predictable handling throughout your ride.
Heat-treated 6061 T6 aluminum
Enhanced heat treatment yields a superior strength-to-weight ratio over standard alloy construction — strong where it matters, light everywhere else.
Universal bolt patterns — front & rear
Front wheels fit 4/144 & 4/156 applications. Rear wheels fit 4/110 & 4/115 — covering most major sport ATV brands with no adapters needed.
Machined aluminum beadlock rings
Billet aluminum rings shield the tire sidewall from cuts during compression, impact, and hard-cornering loads on all four wheels.
Replaceable steel nut plates
Lightweight riveted steel nut plates can be swapped out individually — no full wheel replacement needed.
OEM-quality gloss black powder coat
High-grade powder coating resists chipping, UV fading, and corrosion in trail and track conditions.
Aluminum-braced valve stem
Reinforced stem and cap protect against bending and air loss from off-road impacts.
RWI laser-etched logo
Precision-etched branding that holds up to mud, UV, and abrasion without peeling or fading.
Compatibility
Front: 4/144 & 4/156 | Rear: 4/110 & 4/115
Can-Am
DS450X · DS450MX · DS450XC · DS650
Honda
TRX250EX · TRX250R · TRX300EX · TRX400EX · TRX450R
Kawasaki
KFX400 · KFX450
KTM
450SX · 505SX · 525XC
Polaris
Outlaw 450 · Outlaw 500 · Outlaw 525 · Predator 500
Suzuki
LTR400 · LTR450
Yamaha
Banshee · Raptor 250 · Raptor 350 · Raptor 660 · Raptor 700 · YFZ450 · YFZ450R
Beadlock Ring Installation Instructions
1
Clean all mating surfaces
Thoroughly clean the wheel flange and all beadlock ring contact surfaces. Remove all dirt, debris, and old lubricant to ensure even clamping force and prevent bolt loosening under vibration.
2
Apply tire paste to all sealing surfaces
Apply a generous, even coat of tire paste (bead lubricant) to the wheel bead seat, the tire bead, and the inner face of the beadlock ring. This ensures a proper airtight seal between all mating surfaces and helps the bead seat evenly under clamping pressure.
3
Seat the tire bead
Mount the tire onto the wheel and position the outer bead fully into the beadlock channel. Ensure the bead is seated evenly all the way around the wheel before proceeding.
4
Position the beadlock ring
Align the beadlock ring over the tire bead, confirming all ring holes line up with the nut plates on the wheel. The ring should sit flush against the tire sidewall with no gaps around the perimeter.
5
Install all bolts finger-tight
Thread all beadlock bolts in by hand until snug but not tightened. This ensures the ring stays centered and the bead remains evenly compressed before final torquing.
6
Torque bolts in a star pattern
Using a calibrated torque wrench, tighten bolts gradually in a cross/star pattern — working opposite sides of the ring alternately. Complete at least two full passes, incrementally increasing torque until all bolts reach the specification below.
7
Inflate tire and re-check torque
Inflate the tire to the recommended PSI. Once inflated, go around the ring a final time to confirm all bolts remain at spec. Tire pressure can cause slight bead movement that may affect bolt seating.
7.5 ft·lb
Maximum beadlock ring bolt torque — applies to all wheels, front and rear
Do not exceed this specification on any wheel. Over-torquing can damage the aluminum nut plates, strip threads, or warp the ring, leading to bead seal failure.
Re-check beadlock ring bolt torque on all wheels after the first ride and periodically thereafter, especially following hard impacts or extended trail use.